Showing posts with label Google. Show all posts

Wednesday, 12 June 2013

AT&T teases Samsung Galaxy S4 Active in video, June 13th launch appears likely

Enhanced by Zemanta

Monday, 3 June 2013

Siri Knows You’re A Dirty Cheater At Video Games [Easter Egg]


siricheatcodes3

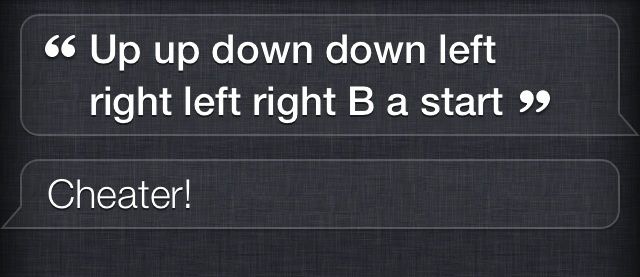
Siri knows everything (kind of). She even knows when you’re trying to use the Konami Code to cheat your way towards world domination.

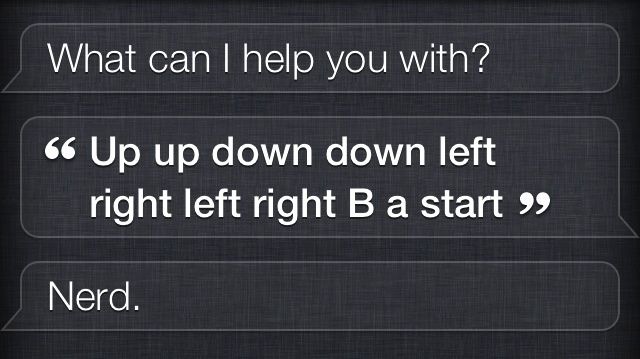
In a newly discovered Siri Easter egg, if you try to give Siri the Konami Code (up, up, down, down, left, right, left, right, B, A, start), she’ll chide you for your cheating ways.

Here are two other responses you can get in the Easter egg: 

siricheatcodes
siricheatcodes21

HTC One’s Android 4.2.2 Update Leaked, New Features Detailed


Black-HTC-One-BlinkFeed

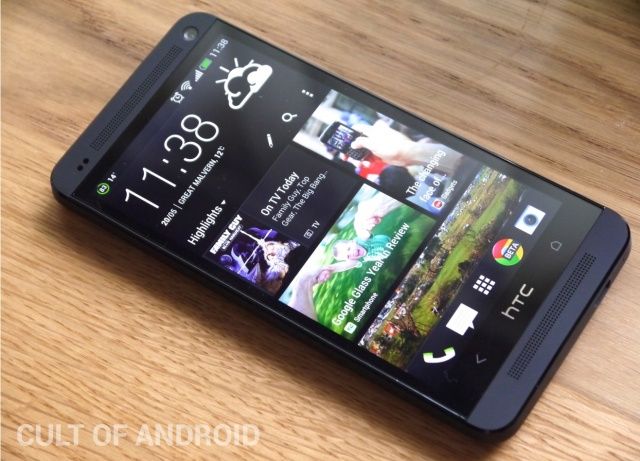
One of the few disappointments with the HTC One is that it still runs Android 4.1, however, a new report suggests the latest Android 4.2.2 update isn’t far away. And for existing users, it’ll be well worth the wait, because it brings a whole host of new features.

The first change we will notice is the option to have the battery percentage displayed in the status bar, without having to download a third-party application from the Play Store. This can be activated in the power settings.

The second change brings some changes to the native Android quick settings. There are a few new toggles, including a change to the native power save mode, which no longer takes up space at the top of the notification pane.

Many users would agree that the virtual button situation on the HTC One is a bit odd, but the third change will reportedly bring more customization. Users will now have the ability to change the function of the long-press activation on the home button from Google Now to a custom menu button.

HTC’s next OS update also brings some minor adjustments, including Daydream, the ability to remove all icons from the dock, Blinkfeed has been improved and applications in the dock are not hidden in the app drawer.

This all sounds well and good, but it’s worth noting that this update is still unofficial, which means that the final build could look very different. We’re at least expecting the changes above, however, and possibly some more if we’re lucky.

You can follow us by "like" our Facebook page to keep yourself updated on all the latest from Microsoft, Google, Apple and the web.


Enhanced by Zemanta

Root Galaxy S II On Android 4.0.3 ICS With CF-Root [How-To Tutorial]

News of an imminent Ice Cream Sandwich release for the Samsung Galaxy S II has been lingering for the past couple of weeks now, but it would appear those in desperate wait to install Android 4.0.x on their S II have had their prayers answered by Google.

Of course, no sooner does it break, does one of the talented developers acquire the root. Much like the iOS jailbreak community, which saw a jailbreak for iOS 5.1 just hours after Apple announced the release, Android developer Faryaab has created the method, based on Chainfire‘s popular CF-Roottool.

Galaxy-S-II

As per usual, the scoop comes courtesy of the guys over at XDA Developers – a popular hunt of Android enthusiasts, and we’ve compiled a step-by-step guide for those looking to root their newly ‘Ice Cream Sandwiched’ Samsung Galaxy S II!

DISCLAIMER: As usual, Redmond Pie will not be held responsible for any loss of data, nor if your device gets damaged in the following of this guide. Proceed at your own risk.

Since the CF-Root tool doesn’t come with a custom recovery like ClockworkMod Recovery, you’ll need to flash it yourself. Please check out our how to flash ClockworkMod Recovery tutorial for more information.

Step 1: Download the required kernel for your Samsung Galaxy S II:
Extract the .zip file.

Step 2: If your device is connected to your computer, please disconnect it.

Step 3: Download and launch ODIN v1.85 [XDA Thread]

Step 4: Click on PDA and select the CF-Root-xxx-vX.X.tar which will be located in the file you extracted in Step 1.

Step 5: Switch off your Galaxy S II, and once it is completely shut down, press and hold Volume Down + Power to place the device into download mode.

Step 6: Once in download mode, connect your Galaxy S II to your computer.

Step 7: Make sure you have not checked the Re-Partition option.

Step 8: Click on START and wait for your device to reboot.

If everything has gone as it should have, your Galaxy S II will now be rooted on Android 4.0.3 Ice Cream Sandwich.

If you have any queries, check out the official thread over on XDA.

Friday, 31 May 2013

How To Install / Flash ClockworkMod Recovery On Your Android Smartphone [TUTORIAL]

Because of its relatively open nature, Android is a whole lot more fun to play around with than Apple’s iOS. One very important tool, which is in just about every flashaholic’s phone isClockworkMod Recovery and today we’ll be talking about some of its useful features and how you can install it on your phone.

image446

ClockworkMod Recovery (CWM) is a custom recovery for Android devices which replaces the stock recovery, allowing users perform some very powerful actions. One of its main features is allowing users to make comprehensive backups, restore said comprehensive backups in case of a technical disasters, flash custom ROMS/themes/hacked apps, install updates to Android operating system manually and more. We will be referring to this guide whenever we talk about flashing custom ROMS or custom hacked apps.

How to Flash ClockworkMod Recovery

Before you can install ClockworkMod Recovery on your Android device, it is absolutely essential that your device is rooted first. As there are hundreds of Android smartphones and tablets available in the market, it would take a short book to cover rooting methods for them all. The easiest way to find out the process for rooting is to perform a Google search: “how to root <your device name here> on <version of Android you’re using here>”. You can find out the version of Android by navigating to Settings > About after tapping the Menu key.

Once you’re rooted, you must flash ClockworkMod Recovery. For most phones, the method mentioned below works flawlessly, however, for devices like the HTC HD2 and Nook Color, which do not come installed with Android, you will need to find out another way to flash CWM using the search engine of your choice.

Step 1: Download and install ROM Manager FREE [Market Link] on your Android device. You can also install the Premium version [Market Link] if you wish to remove ads and have access to more ROMs.

Step 2: Launch ROM Manager. From the main menu, tap on Flash ClockworkMod Recovery.

SC20110907-181118

Step 3: You will be asked to confirm your phone’s model. Although this is a simple option to choose, there are many phones which come with different models which require a different version of CWM. Once again, use Google to find out which model you have. We’ve got a Samsung Galaxy S II, so we chose the appropriate option.

SC20110907-181123

Step 4: Your phone will reboot after downloading and flashing CWM.

Now, if you wish to boot into CWM, you have a couple of options. Your first option is to launch ROM Manager and tap Reboot into Recovery. If this method does not work for you (it doesn’t for us on our Galaxy S II), your second option is to reboot into CWM manually.

To reboot into CWM manually, shut down your phone by holding the power button. Once it is shut down, you have to press an exact button combination on your phone while it is booting up. For most phones, it is Volume Down + Power Key, but it is best to look up “how to boot into clockworkmod recovery <your device name here>” on Google to ensure you’ve got the right button combination. Just so you know, our Galaxy S II unit requires Volume Up + Home + Power buttons to be pressed while booting up to get inside CWM.

Be sure to check out our Android Apps gallery to explore more apps for your Android device.

You can follow us by "like" our Facebook page to keep yourself updated on all the latest from Microsoft, Google, Apple and the web.

Thursday, 30 May 2013

Install Android 4.2.2 On Galaxy S3 GT-i9300 (CM 10.1) [How-To Tutorial]

CyanogenMod 10.1 nightly builds based upon the very latest Android 4.2.2 Jelly Bean can now be installed on your Galaxy S III (GT-i9300). If you own this particular model, and wish to check out the latest nightlies, please check out our step-by-step tutorial after the break.

One of Android’s biggest assets is its ability to be modified extensively, and with CyanogenMod being one of the most popular aftermarket firmware ROMs around, many dev-orientated folks like to check out the nightly builds released in between main versions. If you just so happen to be one of those individuals, please check out the detailed tutorial below.

CM101 GS3

DISCLAIMER: Before we get started, please note that Redmond Pie will not be held responsible for issues that may aries with your device as a result of following this tutorial. Proceed at your own risk.
Additionally, since these nightly builds seldom run perfectly, we only advise installing on a spare Galaxy S III, as opposed to your daily driver. Again, we’ve warned you, this ROM might not serve as your daily driver, let’s begin!

Step 1: First off, you will need to root your Galaxy S III, and then flash ClockworkMod Recovery to it.

Step 2: Download the latest nightly of CM10.1 from the CM Downloads page, as well as GApps for CM10.1, which you can grab by doing a simple search on your favorite search engine. Once downloaded, drop them into the both into the /sdcard directory of your handset.

Step 3: Next, you will need to shut down your Galaxy S III before booting into ClockworkMod Recovery. If you’re unsure of how to do this, you just need to remember to hold Volume Up + Home + Power simultaneously.

Step 4: Take a Nandroid backup.

Step 5: Next, you’ll want to navigate to install zip from sdcard > choose zip from sdcard and then select your CM101.zip file. It’s best to rename the CM 10.1 zip you downloaded in Step 2 toCM101.zip so that you can locate it easily.

Step 6: Apply the same process as in step 5, but for GApps.

Step 7: From within the ClockworkMod main menu, select wipe data / factory resetand once the process is complete, opt to reboot system now from the main menu.

evo4gcm101 (1)

Provided  everything has gone as it should, your device will boot into the nightly build of CyanogenMod 10.1 (based on Android 4.2.2) you downloaded earlier on.

You can follow us by "like" our Facebook page to keep yourself updated on all the latest from Microsoft, Google, Apple and the web.

Tuesday, 28 May 2013

LG Finally Makes The White Nexus 4 Official, Confirms It Won’t Make Nexus 5


LG-White-Nexus-4

            LG has finally made the white Nexus 4 official, almost three months after it was first spotted out in the wild. The device has exactly the same specifications as the original model — there is no storage bump as previously rumored — but its back and sides have been given a new lick of paint.

             As a reminder, those specifications include a 4.7-inch 720p, a quad-core Snapdragon S4 Pro processor, 2GB of RAM, and an 8-megapixel rear-facing camera with an LED flash. There’s also a 1.3-megapixel front-facing camera for video calling, and 8GB and 16GB storage options.

             The white Nexus 4 will launch in Asia, Europe, North America, and the Middle East over the “next few weeks,” according to LG’s announcement. The company hasn’t confirmed pricing yet, but we expect it to cost the same as the black model.

               LG also made another announcement this morning; the company confirmed it would not be building Google’s next-generation Nexus 5 — despite recent rumors claiming it was already under development:

               “There are currently no plans for a Nexus 5 made by us,” it said. “We don’t need that kind of marketing exposure anymore. The Nexus 4 was a great succes, even with the supply issues and we have a great relationship with Google. But we won’t make the Nexus 5.”

                  LG hasn’t ruled out working with Google in the future, then, but it certainly won’t be making the company’s next smartphone. It’s unclear who that task will fall to now, but Google and Samsung have worked well together in the past.